Are you looking to reduce/clean up your database?
As a Navision programmer (Business Central programmer), I'm sure you also need an up-to-date complete copy / test environment from time to time for secure development / programming under Navision.
The following instructions assume that the corresponding Navision services for a parallel programming environment / test version are already installed. If not: please contact me. Here you will find instructions for the installation of Navision Out of the Box.
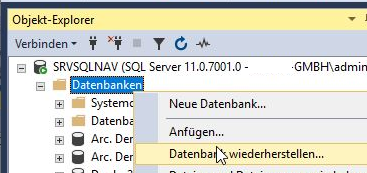
Start the SQL Management Studio. The SQL server always performs the actions to be carried out immediately on its hardware, so it does not matter whether you start the Management Studio on your own computer or directly on the SQL server, for example.
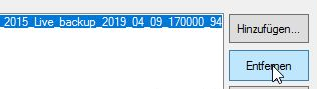
Delete the now obsolete test database:
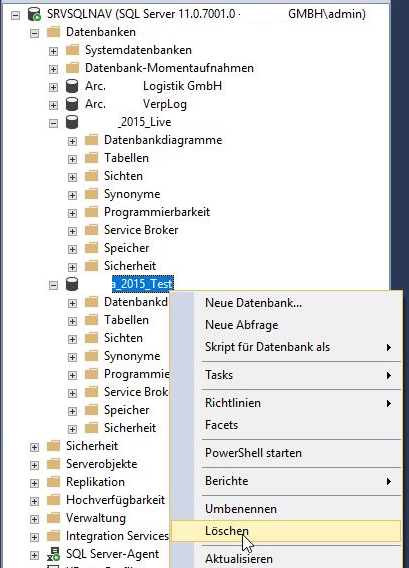
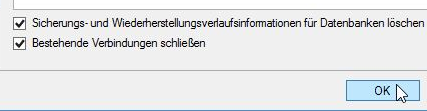
Please ensure that you select the "Close existing connections" option. The Navision service for the test environment is still accessing the database and would otherwise prevent deletion. It is better to check twice that you really delete the "test" database!
Create a data backup from the productive database (often also called live database or real database).
Note: You can theoretically also create a mirror or a database copy from an existing database. However, experience has shown that this is often rejected by the SQL server. If you use the method described here, you will always achieve your goal.
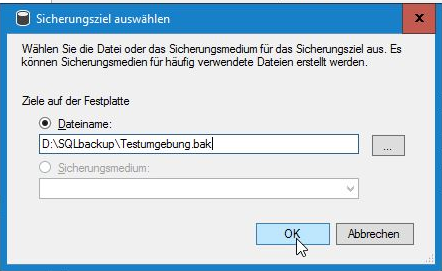
Delete a destination that may already be filled in:
and create a new backup destination via "Add". Attention! This file must be accessible via the SQL server service account! However, you may also see directories and folders in the selection that are accessible to you as a logged-in user. This does not necessarily mean that the SQL server service can also access them! If the backup behaves "strangely" or displays "strange error messages", always check first whether the SQL server service also has access to the selected file/folder.
Recommendation: On the "Backup options" page, set the compression to "Compress backup", the storage space saving is often around 40%, and depending on the processor, the backup can even be faster than without compression. If the server is often under such a heavy load that the backup (with compression) slows down the users of the regular database, you should check your Navision programming (or have it checked). In most cases, it is not the server that is too slow, but the programming that is too bad.
If the backup file selected in the last step already exists, please note the setting "Overwrite all existing backup sets" on the Media options page.
Now click OK . The server (not Microsoft SQL Management Studio!) will now start the backup.
Depending on the size of the database, this process will take a few minutes. Rule of thumb: 1 minute per 25 Gb. Depending on the configuration (magnetic hard disks instead of SSD, little working memory, target connected via 100Mbit instead of Gb...) it can also take longer.
After a short time, "The backup of the database [...] was successfully completed" is displayed. Press OK again.
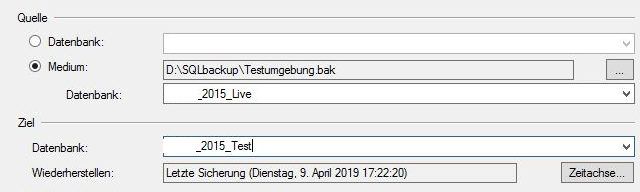
Under Source, switch to "Medium" (here you could also restore directly from an existing database, but this is often acknowledged with an error message) and then select the previously created backup file.
Under Destination, enter the name of the database deleted at the beginning under "Database".
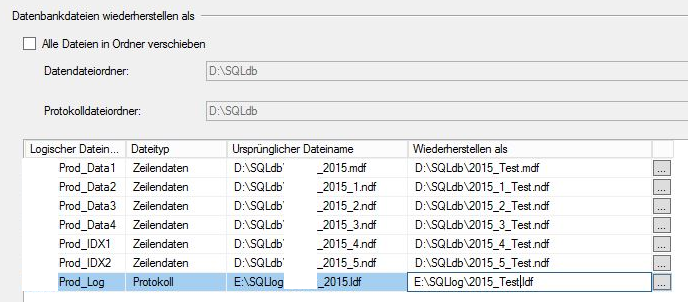
On the Files page, change the "Restore as" file names. The easiest way to do this is if you have a separate folder for the test database (Navision programmer database), then simply select "Move all files to folder".
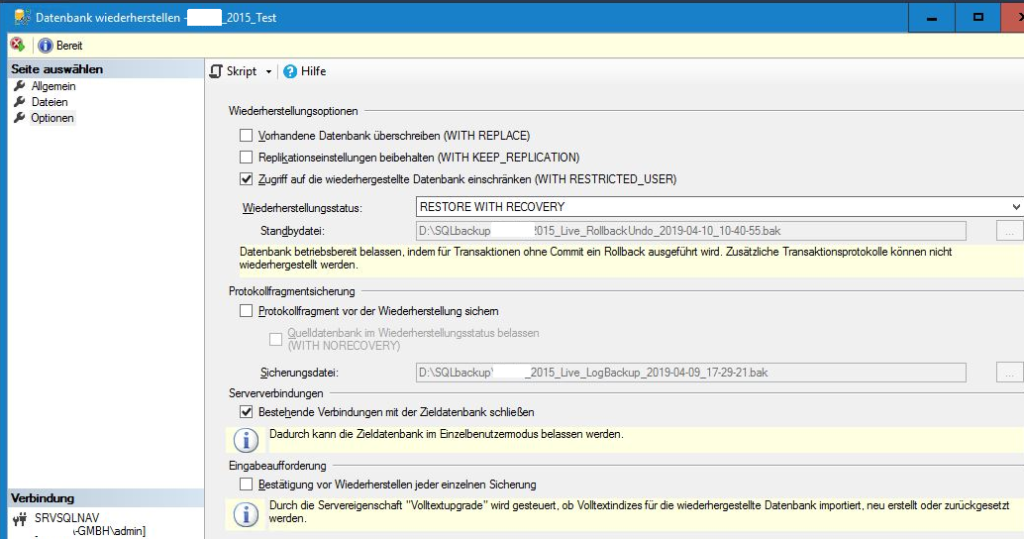
Please make the settings on the Options page as follows:
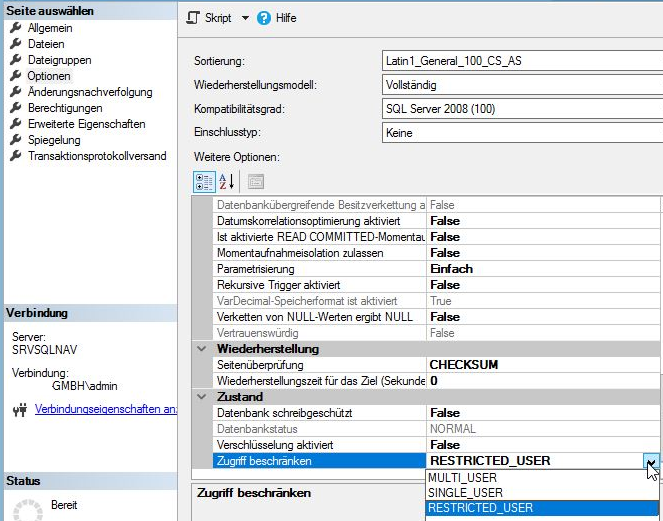
Then simply remove OK. After a few minutes (about the same time as the backup) the new test database (Navision programmer database) is restored. Now the restricted Access must be changed. Call up the properties of the database you have just restored:
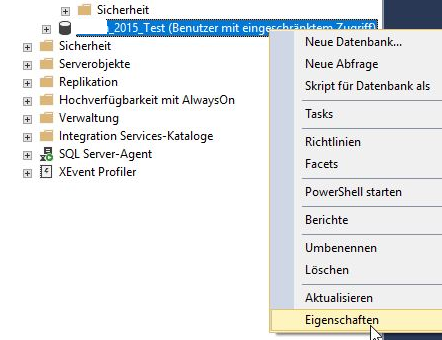
and activate Multi_User mode under Options/ Restrict access. Confirm the query with Yes. You have now updated the complete test environment for yourself or other Navision / Buiness Central programmer developers 100% with just a few mouse clicks.
There are other, shorter ways than the one described here. However, using the method described here, you should be able to both obtain a backup and restore this backup under all circumstances.