
The NavBDE store floor data collection works completely without additional PDA terminals or special hardware, as offered e.g. by Kienzle etc.. It works purely on barcode basis and with normal, simple computers with Navision as Windows client or web client. This way, Navision store floor data collection can be scaled quickly and easily. No additional licenses for additional data collection programs are needed. This reduces the costs for additional hardware.
For each workstation/workshop, a PC is hung up that is equipped with a permanently reading scanner. On this PC, Navison starts automatically with a Windows login and calls up the PDA Autoscan page. As soon as a barcode is read, this page reacts as described here.
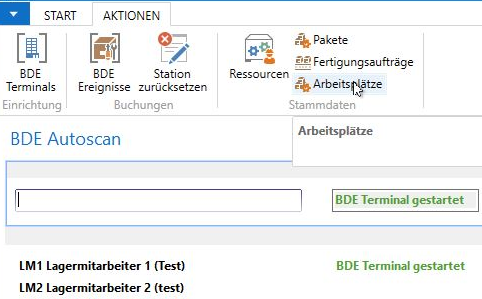
The basic setup of a PDA computer can be found at the end of this article!
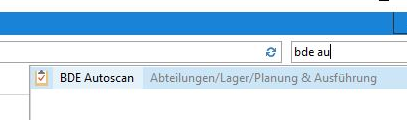
Manual access to the PDA autoscan: CTRL+F3, PDA or Autoscan
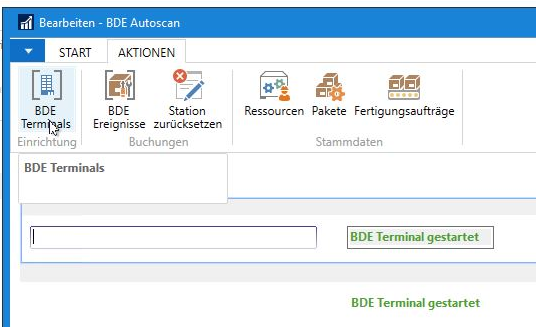
Terminal setup:
Navision automatically collects all computer names during operation on which Navision was started at least once. In this way, the operational data collection devices can be set up quickly.
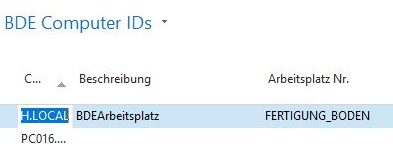
Description: An optional name for this computer/ PDC terminal.
Workstation No.Here you specify the work center (routing step, activity) for which Navision is to record times at this PDA device.
This can be changed (see below) at any time via the PDA workstation posters. So simply change the function of any PDC terminal at any time depending on e.g. the workload in operation.
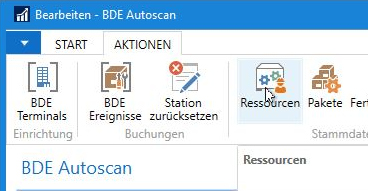
Setting up the resources:
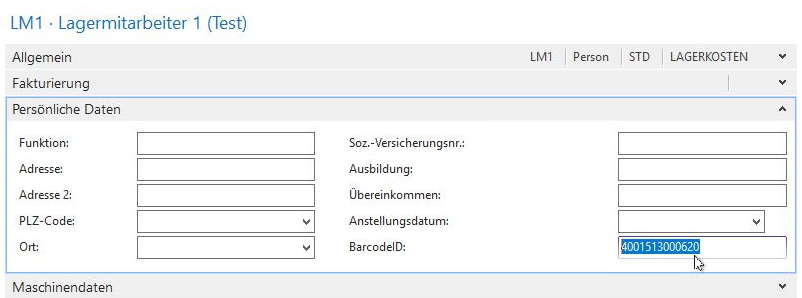
Store a barcode for employees who are to log on to production workstations via PDC. Ideally, this barcode is also printed on the employee's ID card, for example.
Logging on and off employees, production orders
Employee login: Simply scan the barcode from the employee ID card.
Employee logout: Simply scan the barcode from the employee ID card.
Register production order: Simply scan the barcode from the production order.
Logout production order : Simply scan the barcode from the production order.
Switching the workstation (Machine center): Simply scan the barcode from the new workstation poster. Attention! Any active production order must first be completed! Resources are automatically booked out.
Navision recognizes itself whether it is an employee, a change of location, a package booking or a production order.
Navision also recognizes the current status (start or end) based on the scan history.
The activity (workstation) is also already stored in the terminal (can be changed at any time) and therefore does not have to be entered repeatedly.
The terminal permanently displays
-Which operation (Machine Center) is active
-What resources are registered at this station
-Which production order is currently logged in
-and a brief history of the last PDC operations:
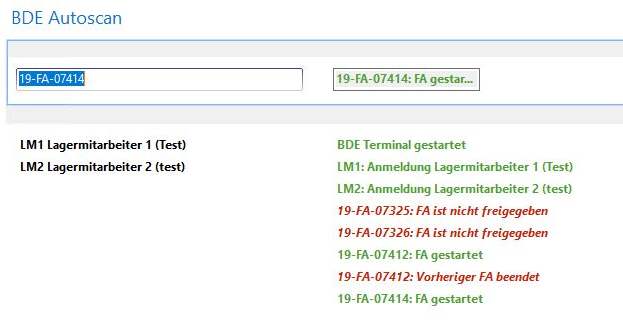
Navision automatically restores the correct state at the next start.
When finishing a production or a production substep, the accumulated time is automatically posted to the production order. At the PDC station with the "order production end" indicator, the production order is automatically posted with target quantity = actual quantity. The target quantity can still be corrected in the production order up to this point.
Switch workstation per terminal
At runtime, each Navision PDA terminal can be converted via a PDA poster. Hang this PDA poster above the PDA terminal so that the employees can clearly see which work step (workstation) is recorded at exactly this PDA terminal.
You can print the PDA posters here:
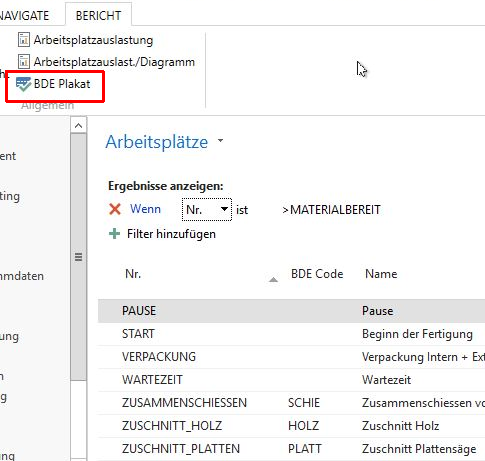
Navision then prints a poster per workstation with the workstation name and activation code:

Print these posters as often and in any number of copies! This way, the shift supervisor or hall manager has several of these posters ready for each operation in each hall. Thus, if necessary, Navision PDA terminals can be quickly and easily changed in their function.
In the PDA Autoscan screen, the barcode can be read from the poster. The affected terminal then switches its workstation to this function. Navision saves this in the device data so that this terminal still matches the poster attached above it the next time it is restarted.
The Workstations screen can also be called directly from the PDA Autoscan work window:
Connect Mini PC with power supply, connect monitor (DisplayPort or HDMI, depending on the possible combination). Connect scanner with mini PC.
User setup:
A generic user PDA is created for these computers.
The computers are provided with autologin!
Log in with the user once.
Then simply remove
Netplwiz (Enter Admin Password)
Disable "Users must enter username and password"
Select user, Apply, Enter password, OK.
If this does not work (e.g. because "Users must enter user name and password" is missing):
https://support.microsoft.com/de-de/help/324737/how-to-turn-on-automatic-logon-in-windows
Navision should be started from the Autostart.
Windowstaste+R, shell:startup.
Here with "new" create a "link".
Location of the element:
Dynamicsnav://srvnav:8046/Service name/Client name/runpage?page=50195&mode=Edit
Navision must still
start with the correct client:
start Navision, then
CRTL+O, choose Client name , exit Navision (setting is saved). In the link above the client is already included!
Computer name: This MUST be unique, especially for the PDA!
Suggestion:
PDA_H1_1 for computers of PDA in hall 1, device number 1 (in hall 1).
PDA_H1_2
PDA_H1_3
PDA_H2_1
CTRL+ESC, enter pc-n . The following entry appears (i) Display PC name. Click. [Rename this PC] Here you can change the name of the computer.
But it works in principle with any computer name that is unique.
Deactivate energy-saving options , the PC should show a picture all the time (therefore never use OLED displays!).
CTRL+ESC, Enter energy. Select the option O Settings for mains operation.... Select "Never" for both screen and mains operation.
Scanner setup:
The scanners are delivered completely ready for operation.
Important parameters:
Continuous scan active
Code 39 (oder 3of9) activated
Add Enter