Delete many images in Google Photos at once

Attention! Apparently, Google Drive has „improved“ (made worse) the tagging function.
Please scroll down to „New method“.
Especially if you (like me) are married to a Filipina, Asian in general, you a) don't want to do without photos & selfies... but b) at some point, every Google storage space you book will run out. And then you have 10,000 (tens of thousands, yes!) photos that you have stored on Google Photos https://photos.google.com/ want to delete... or rather: have to.
And there doesn't seem to be a way to delete all of them, or at least a lot of them, in one go. I have tried many „How to“ pages... nothing helped.
Voreinstellung/Vorbereitung
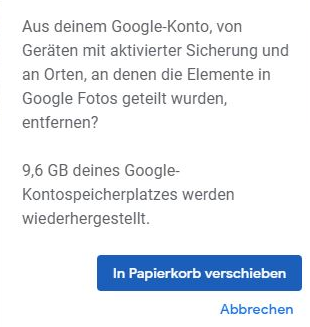
But there is at least a little trick to delete +/- 1,100 images at a time. Attention! These are also deleted on the cell phone if „Backup“ is still active there! Therefore, either deactivate the backup on the cell phone in Photos via the account at the top right, then „Settings“, if this deletion is not desired.
Helpful & tidy image storage
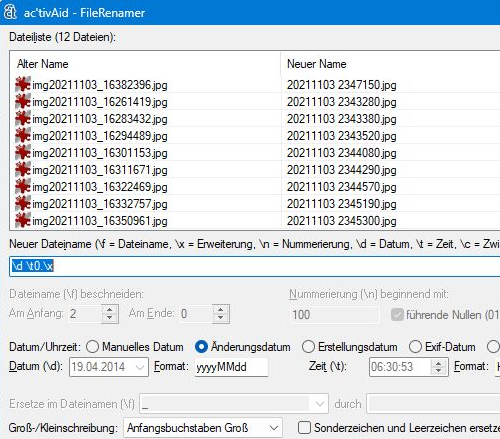
I upload all the photos from our cameras and our cell phones to an extra folder on the PC at irregular intervals. There I name them with ac'tiv aid all uniformly by YearMonthDayHourMinuteSecond. With ac'tivAid, this can also be done in a matter of seconds, and all, but really all files, including burst/video or file names numbered consecutively or otherwise designated by the cameras, are numbered consistently, sensibly and chronologically:
Extra tip in the Extra tip: With Ac'tive Aid you can also make yourself Your Navision Financials Dynamics/ Microsoft Business Central 365 life much easier!
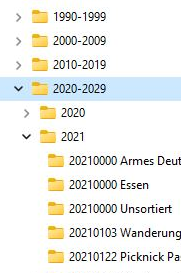
This way I have all the photos of an event together in chronological order. For larger amounts of pictures, e.g. of weddings, celebrations, repairs etc., I create an extra folder with the folder name YearMonthDay DescriptionOfEvent, so that I can quickly access my niece's christening, for example, even years later: I then put these folders into top-level folders and I can quickly access the desired event! My wife (and now me, too...) also love to keep a record of food & drinks. Restaurants to take photos. I often do NOT put them in a separate subfolder, as we hardly ever access them again anyway. That's why there are folders, here using the example of „Food“:
Then I put all the pictures from this event - simply sorted by date and time, it takes seconds with the preparatory work - into this folder. Then I look through this folder again and delete duplicates and blurred images and boring/long videos - or quickly edit them too LooselesCut boring or shaky starts and finishes. Also goes very quickly.
Delete many images in Google Photos in one go
Attention! Apparently, Google Drive has „improved“ (made worse) the tagging function.
Please scroll down to „New method“.
So! Now to the topic!
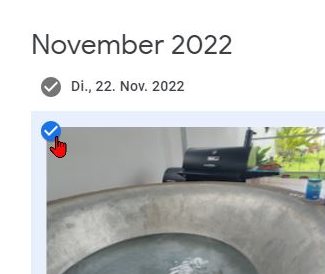
Open Google Photos, click on the first picture in the top left corner to activate it:
Then scroll down 20 or 30 pages with the PICTURE DOWN button. You can also use the mouse wheel, but it is much slower. It does NOT work with the scroll bar on the right edge!
Then move the mouse arrow to one of the images on the right, DO NOT CLICK! Press the Shift/uppercase key.
If you have NOT marked too many images, ALL images up to the current image will now be marked (highlighted in blue and the ticks will all turn on).
Only the current image is ticked? Please press the PICTURE UP button, go back a few pages and try the last step again.
The hooks appear? Wonderful! Now click on the tick of the active image: All images from the first marked image to the one just marked will be actively marked (until just now it was only a preview of the marking).
You can mark about 1,100 images (or less) in this way. I have not yet found the exact limit, but it is obviously less than 1,200 images.
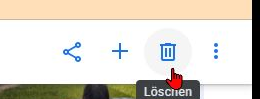
Now press the trash can at the top right:
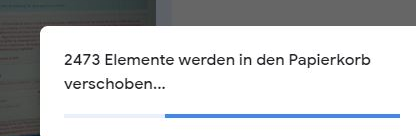
Extra tip Tip: This limit of 1,100 images is not 100% fixed! From time to time, but not reliably, it also helps to first proceed as described, and then continue scrolling with the scroll wheel of the mouse, and check from time to time with the Shift key whether Google Photos is still following the multiple selection. This is how I got the screenshot above with almost 2.5K images. However, this is the first time I have done this while writing these instructions. However, I can now always manage the +/- 1,100 images and have freed up my storage space in just a few minutes.
New method
Sometime in 2025, Google probably caught on to this „trick“ and changed the way you tag images so that the above „trick“ no longer works.
With the skillful use of mouse and keyboard, however, you can still reach your goal quickly, even if not quite as quickly as with the old method. But... Try it out anyway, maybe the method described above still works for you?
- Open Google Photos as before
- Activate „List view“ quite far up on the right. This will make the following steps a little quicker, which is what we want.
- Scroll down the page until the „Show more“ button appears.
- Place the mouse pointer on the „Show more“ button and click.
- With CTRL+End down (Ctrl +End on English keyboards) quickly jump to the end of the new page, the button „show more“ is now exactly under the mouse arrow! -> Click on it.
- Repeat step 6 14 times until a maximum of 500 files are marked. You can see the current number at the top left to quickly get a feel for how often you repeat step 6. Google always displays 32 documents, 15 x 32 = 480, so if you miscount slightly when repeating, then only count up to 13. Unmarking too many marked photos takes longer than repeating this cycle once more.
- Now click on the small box at the top left next to „is displayed“: All 480 documents are marked. Now click on the trash can (top right).
With the very smallest exercise, you can manage around 1500 documents in just over a minute, including Google's deletion cycle.
Delete all images at once Delete images Google Photos Delete Google Photos images Delete many images at once