

If you are coming here because you are currently setting up a new web client/web service and you are getting the error message „Error accessing the website Type: System:Error accessing the website If you get Type: System.UnauthorizedAccessException, please scroll down quickly, the solution is there.
ATTENTION! Do you even need the client services that require a certificate? Maybe you just need the SOAP or OData or the ManagementConsole for NavUserPassword, then simply turn off the client services, and you won't need a certificate or a CertificateThumbNail!
The Business Central or Navision web client has grown up since the 2018 version! And it continues to grow. Since then, there has hardly been a good reason to use the Windows client. Since Business Central 2019 (Nav Fall Release 2018) (BC15), there is therefore no longer a Windows client. Simply open a browser, enter the URL and start working with Navision or Business Central immediately. Incidentally, even across company boundaries: the web client completely replaces remote access such as an RDP (Remote Desktop Protocol) client, Teamviewer, VNC and other remote access technologies!
Within a Windows domain, logging in via Windows is still the most convenient method and is supported by Navision as standard. Simply install Navision and Business Central as described here and off you go. Especially with the web client! If the browser asks for login data: Simply enter the Windows access data and you're done.
But what if you want to use the client remotely, outside a VPN, outside a Windows domain? Then there is no Windows access data to enter. Nothing easier than that: Change Navision to the credential type NavUserPassword, and... nothing works anymore!
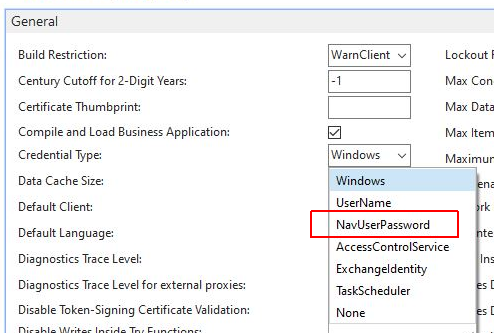
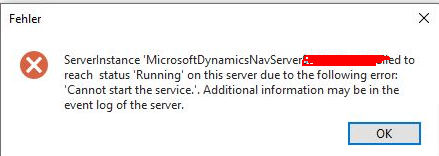
The solution is quickly found in the Event Viewer: Navision now requires a certificate! The event viewer reports the error:
Server instance: xxxx
Type: Microsoft.Dynamics.Nav.Types.NavConfigurationException
SuppressMessage: False
ContainsPersonalOrRestrictedInformation: False
DiagnosticsSuppress: False
MessageWithoutPrivateInformation: Certificate with the fingerprint was not found in the CurrentUser or LocalMachine memory.
Microsoft.Dynamics.Nav.Types.CertificateHelper.FindCertificateFromThumbprint(String certificateThumbprint)
Microsoft wants to protect the user from himself here, and in this constellation only authenticates via a certificate. Regardless of whether you want or need this additional security level. So roll up your sleeves and off you go. Also very easy since 2018 thanks to new Powershell scripts. The witches' dance with makecert.exe is no longer necessary!!
Attention! Important! The following certificate generation creates a so-called self-signed certificate, just as makecert.exe did previously. This works for the task described here. However, it does not work if you want to release the Navision or Business Central web services on the Internet! In this case, you absolutely need a publicly signed certificate, as you can obtain from various issuers and also from LetsEncrypt.
Note: You can also use any other available certificate, in which case please simply skip the steps for creating a new self-signed certificate. Otherwise, it is easiest to carry out the following steps on the Business Central or Navision database server.
Attention! The following part is outdated. In the meantime (starting around Windows 11 and Windows Server 2022), there is a new built-in cmdlet; it is NO longer necessary to download anything from anywhere beforehand! Please skip further down to „Create certificate with new Windows“
Preparation: You need the Powershell script New-SelfSignedCertificateEx, which you can find here :
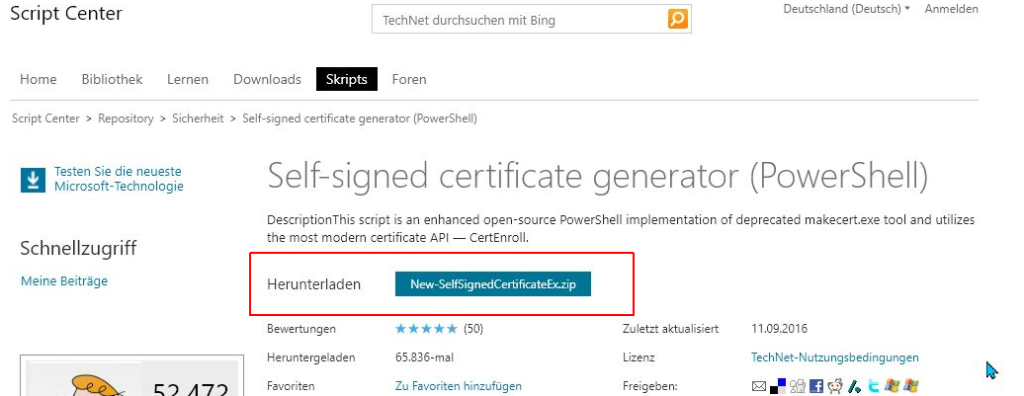
download and unzip this file e.g. to c:\Temp. I have attached the script here , but of course I recommend downloading it directly from Microsoft.
- Start the Powershell in administrator mode
- change to c:\temp (or where you have saved the script)
(Tip: You can type only the first letters of most commands and then complete them with the TAB key)
Set-ExecutionPolicy RemoteSigned
Confirm the query with Y - Import-Module .\New-SelfSignedCertificateEx.ps1
- New-SelfSignedCertificateEx -Subject „CN=Navision-Service“ -IsCA $True -Exportable -StoreLocation LocalMachine -FriendlyName „NavUserAndPassword“ -NotAfter $([datetime]::now.AddYears(5))
Of course, you can change the placeholders for the certificate name and password as you wish.
"Navision service" refers to the server name! At the end of these instructions you will find an option to change this name via the configuration files. Recommendation: Enter the correct DnsIdentiy right here! (computer name when installing Business Central or Navision).
Create certificate with new Windows
The scriptlet / cmdlet is now called
$certname = "Navision-Api" ## Replace {certificateName} with your Nav-Service instance name
$cert = New-SelfSignedCertificate -Subject "CN=$Navision-Api" -CertStoreLocation "Cert:\CurrentUser\My" -KeyExportPolicy Exportable -KeySpec Signature -KeyLength 2048 -KeyAlgorithm RSA -HashAlgorithm SHA256
You can now find this certificate via (Start menu ->) certmgr.msc Certificates - Current User/Personal/Certificates
Now move this certificate to the certificate folder „Trusted Root Certification Authorities/Certificates“:
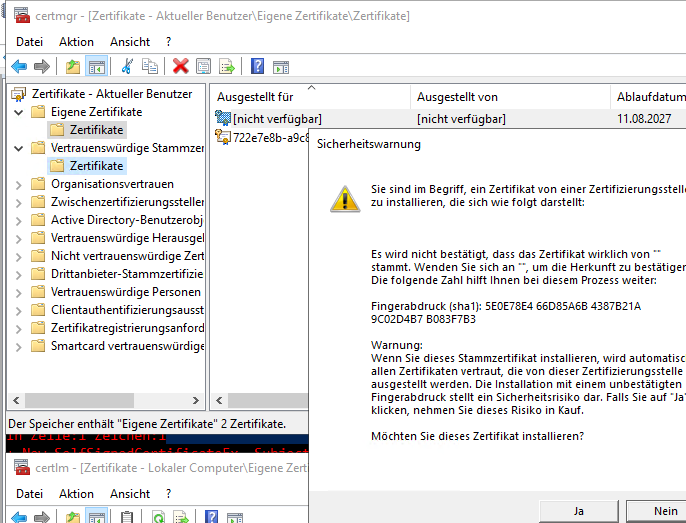
Do not close the shell after the call, you still need the thumbprint.
This command creates a new certificate in the certificate store:

Open an mmc for the certificates (mmc.exe, File/Add SnapIn, Certificate, Computer Account/Local Computer).
Select the newly created certificate, right mouse click, All tasks, Manage private keys
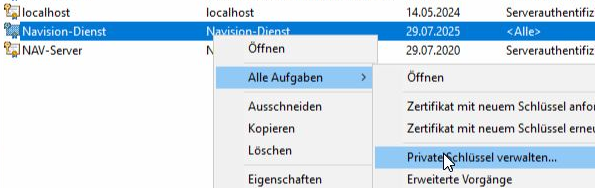
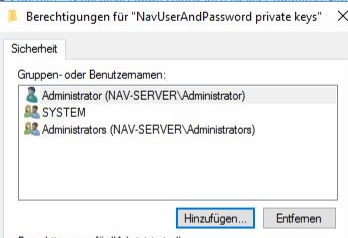
Add the service account of the Navision service server (often Administrator or Network/Network Services)
Please also copy the certificate to the Trusted Root Certificates/Certificates folder (right mouse button/copy, target folder -> paste)

You can now close the certificate management.
Now copy the thumbprint from the console. This is more reliable than copying from the certificate management.
Now add this "fingerprint" (literally: thumbprint) to the Navision service configuration under Certificate Tumbprint:
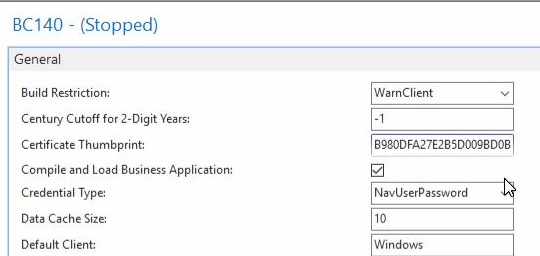
The computer name is stored in the certificate ("Navision service"). If this differs, you can alternatively change this in the:
Identity check error for an outgoing message. The expected DNS identity of the remote endpoint was "nav-server", but the remote endpoint has provided the DNS claim "Navision-Service". If this is a legitimate remote endpoint, you can resolve the issue by explicitly specifying the DNS identity "navision-service" as the Identity property of EndpointAddress when you create a channel proxy.
This is changed in the web.config (up to Nav 2017) or NavSettings.JSON in e.g. the folder C:\inetpub\wwwroot\Instance-Name, e.g. C:\inetpub\wwwroot\BC140 or ClientUserSettings.config in e.g. C:\Users\AppData\Roaming\Microsoft\Microsoft Dynamics NAV\100:
"//DnsIdentity": "The DNS or subject name from the server certificate.",
                       "DnsIdentity": "NAV server",
Change the entry in Dns Identity from "NAV server" (in this example) to "Navision service": Recommendation: Create the certificate directly with the matching DNS entry!
Error accessing the website Type: System.UnauthorizedAccessException
Error accessing the website
Type: System.UnauthorizedAccessException
StackTrace:
at System.IO.__Error.WinIOError(Int32 errorCode, String maybeFullPath)
at System.IO.FileStream.Init(String path, FileMode mode, FileAccess access, Int32 rights, Boolean useRights, FileShare share, Int32 bufferSize, FileOptions options, SECURITY_ATTRIBUTES secAttrs, String msgPath, Boolean bFromProxy, Boolean useLongPath, Boolean checkHost)
at System.IO.FileStream..ctor(String path, FileMode mode, FileAccess access, FileShare share, Int32 bufferSize, FileOptions options)
Do you get this error message, and do you actually plan to install a second web service instance?
Scenario: You already have a web service, e.g. because you operate a (my) avalanche transceiver. This uses the web service to run Navision/BC365 on the tablets. If you now want to operate a 2nd company with its own Navision_Service and perhaps also its own database, you set up a 2nd web instance for it, e.g. using the commandlet
New-NAVWebServerInstance newWebService -Server Localhost -ServerInstance NewNavServiceName -Company MyNewCompany
As a result, you will find a new folder in your www-root folder:
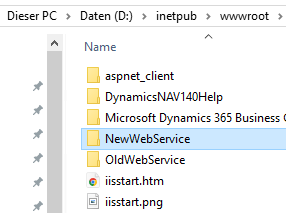
Depending on the Navision version, you still need to change the config. In Navision 2018/BC14, this has to be done in these two files here:
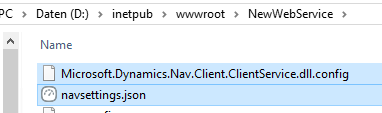
In older Navision versions, this may have been done in these files:
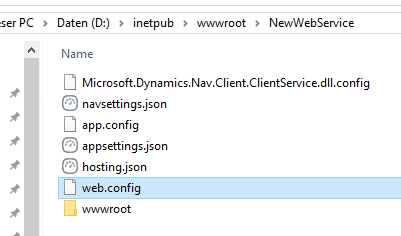
Just open these files one after the other until you find the entries for the server instance and port, something like this:
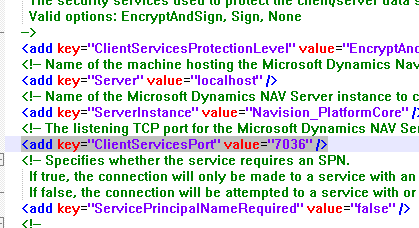
or this one:
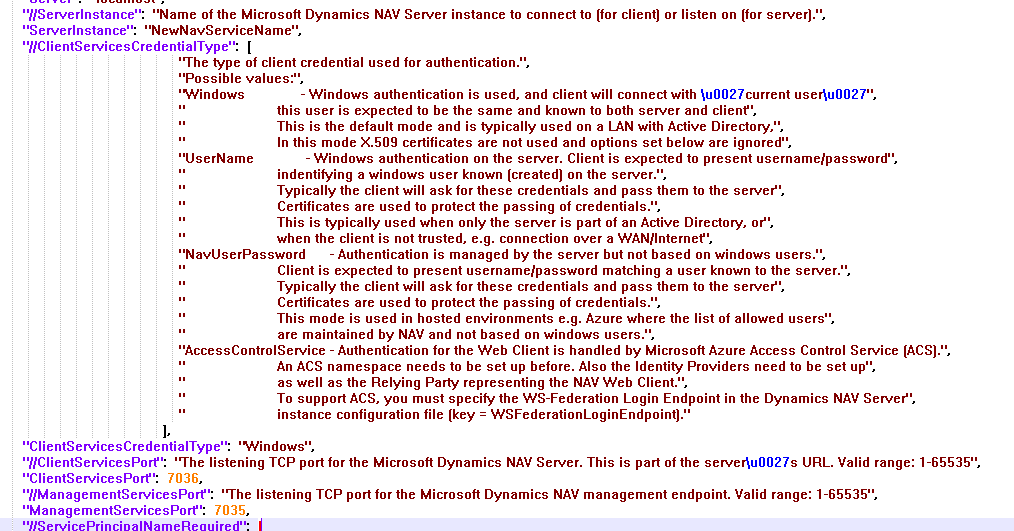
Here you will also find the setting for „ClientServicesCredentialType“: „NavUserPassword“, which may have lured you to my site.
However, you can usually change that more easily via the console.
So, that was it... if... if Windows would cooperate!
The problem folder for the error message
Error accessing the website Type: System.UnauthorizedAccessException
StackTrace:
at System.IO.__Error.WinIOError(Int32 errorCode, String maybeFullPath)
at System.IO.FileStream.Init(String path, FileMode mode, FileAccess access, Int32 rights, Boolean useRights, FileShare share, Int32 bufferSize, FileOptions options, SECURITY_ATTRIBUTES secAttrs, String msgPath, Boolean bFromProxy, Boolean useLongPath, Boolean checkHost)
at System.IO.FileStream..ctor(String path, FileMode mode, FileAccess access, FileShare share, Int32 bufferSize, FileOptions options)
is this one:
C:\inetpub\wwwroot\NewWebService\wwwroot\Resources\Extracted Resources.
Here, the Navision/BC365 client wants to save files, but is not allowed to.
Tip: If you've come here, you've already searched high and low. Make it easy on yourself:
Grant permissions for the entire folder NewWebService for the user IIS_IUSRS „Full control“. Warning! Of course only for internal use! If this web service can be reached via the internet, then this is a security problem. But if you are configuring a system like this, you better not search the internet for solutions to it, but have the professional knowledge for what you are doing right now... or ask someone for help who can.